Tutorial: Creating Unity Assets with SOLIDWORKS
There are two main ways to export Unity Assets with Solidworks. Both methods have their pros and cons, but at the end of the day, the main consideration is if you want to have textures exported from Solidworks, or if you want more control over the computational weight of your asset (which will ultimately dictate the framerate at which your application will run).
Exporting without Textures
The first method, without textures, gives you more control over how heavy the asset is.
Exporting to STL
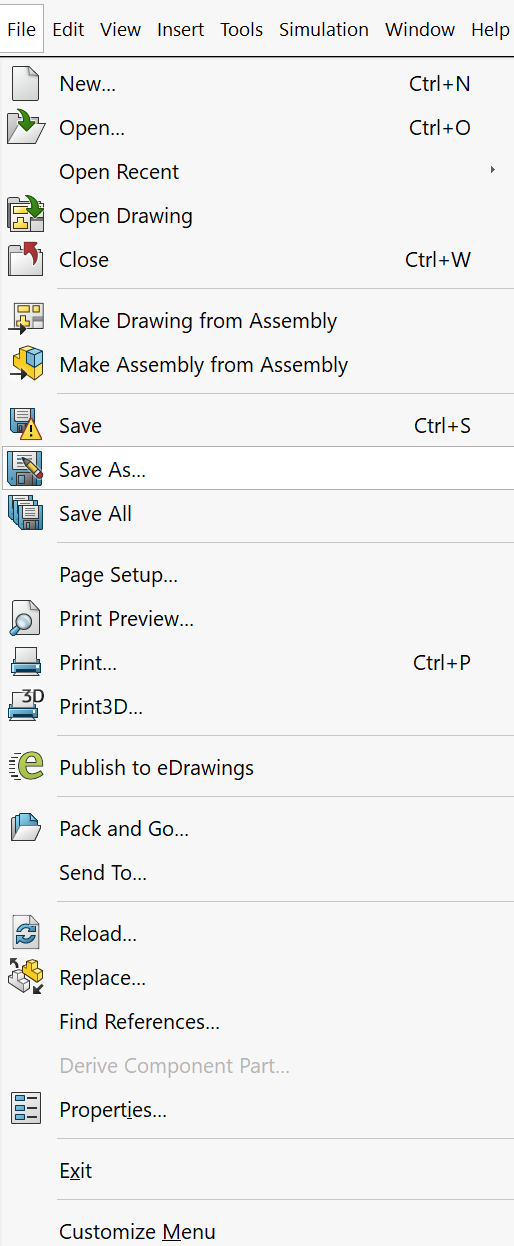
- With SOLIDWORKS, open an assembly file. Under File, select Save As and under Save as type, select .STL
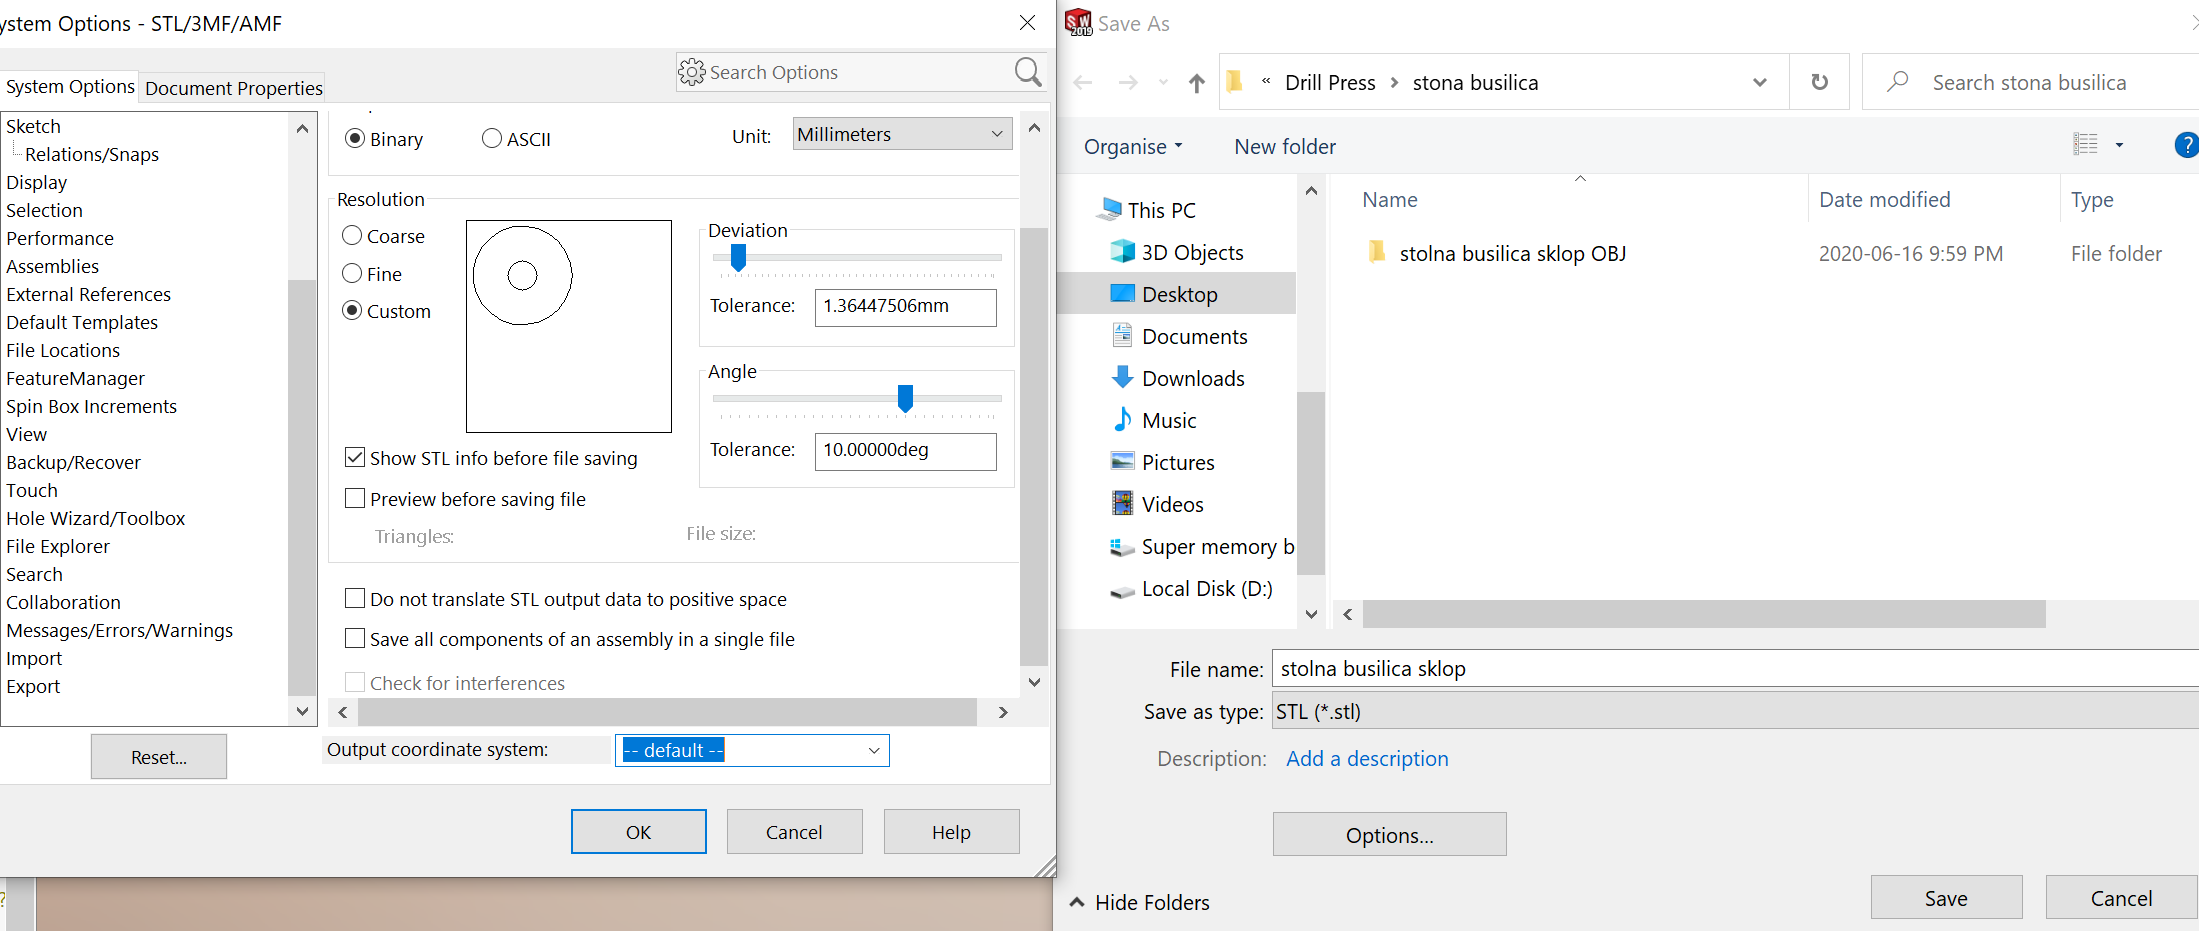
- Press the Options button, and make sure that the option Save all components of an assembly in a single file is unchecked. You may also change the quality of the STL you export in this option dialogue. You should now have a .STL file for each assembly part. Place all the .STL files into a single folder.
Importing .STL files into Blender
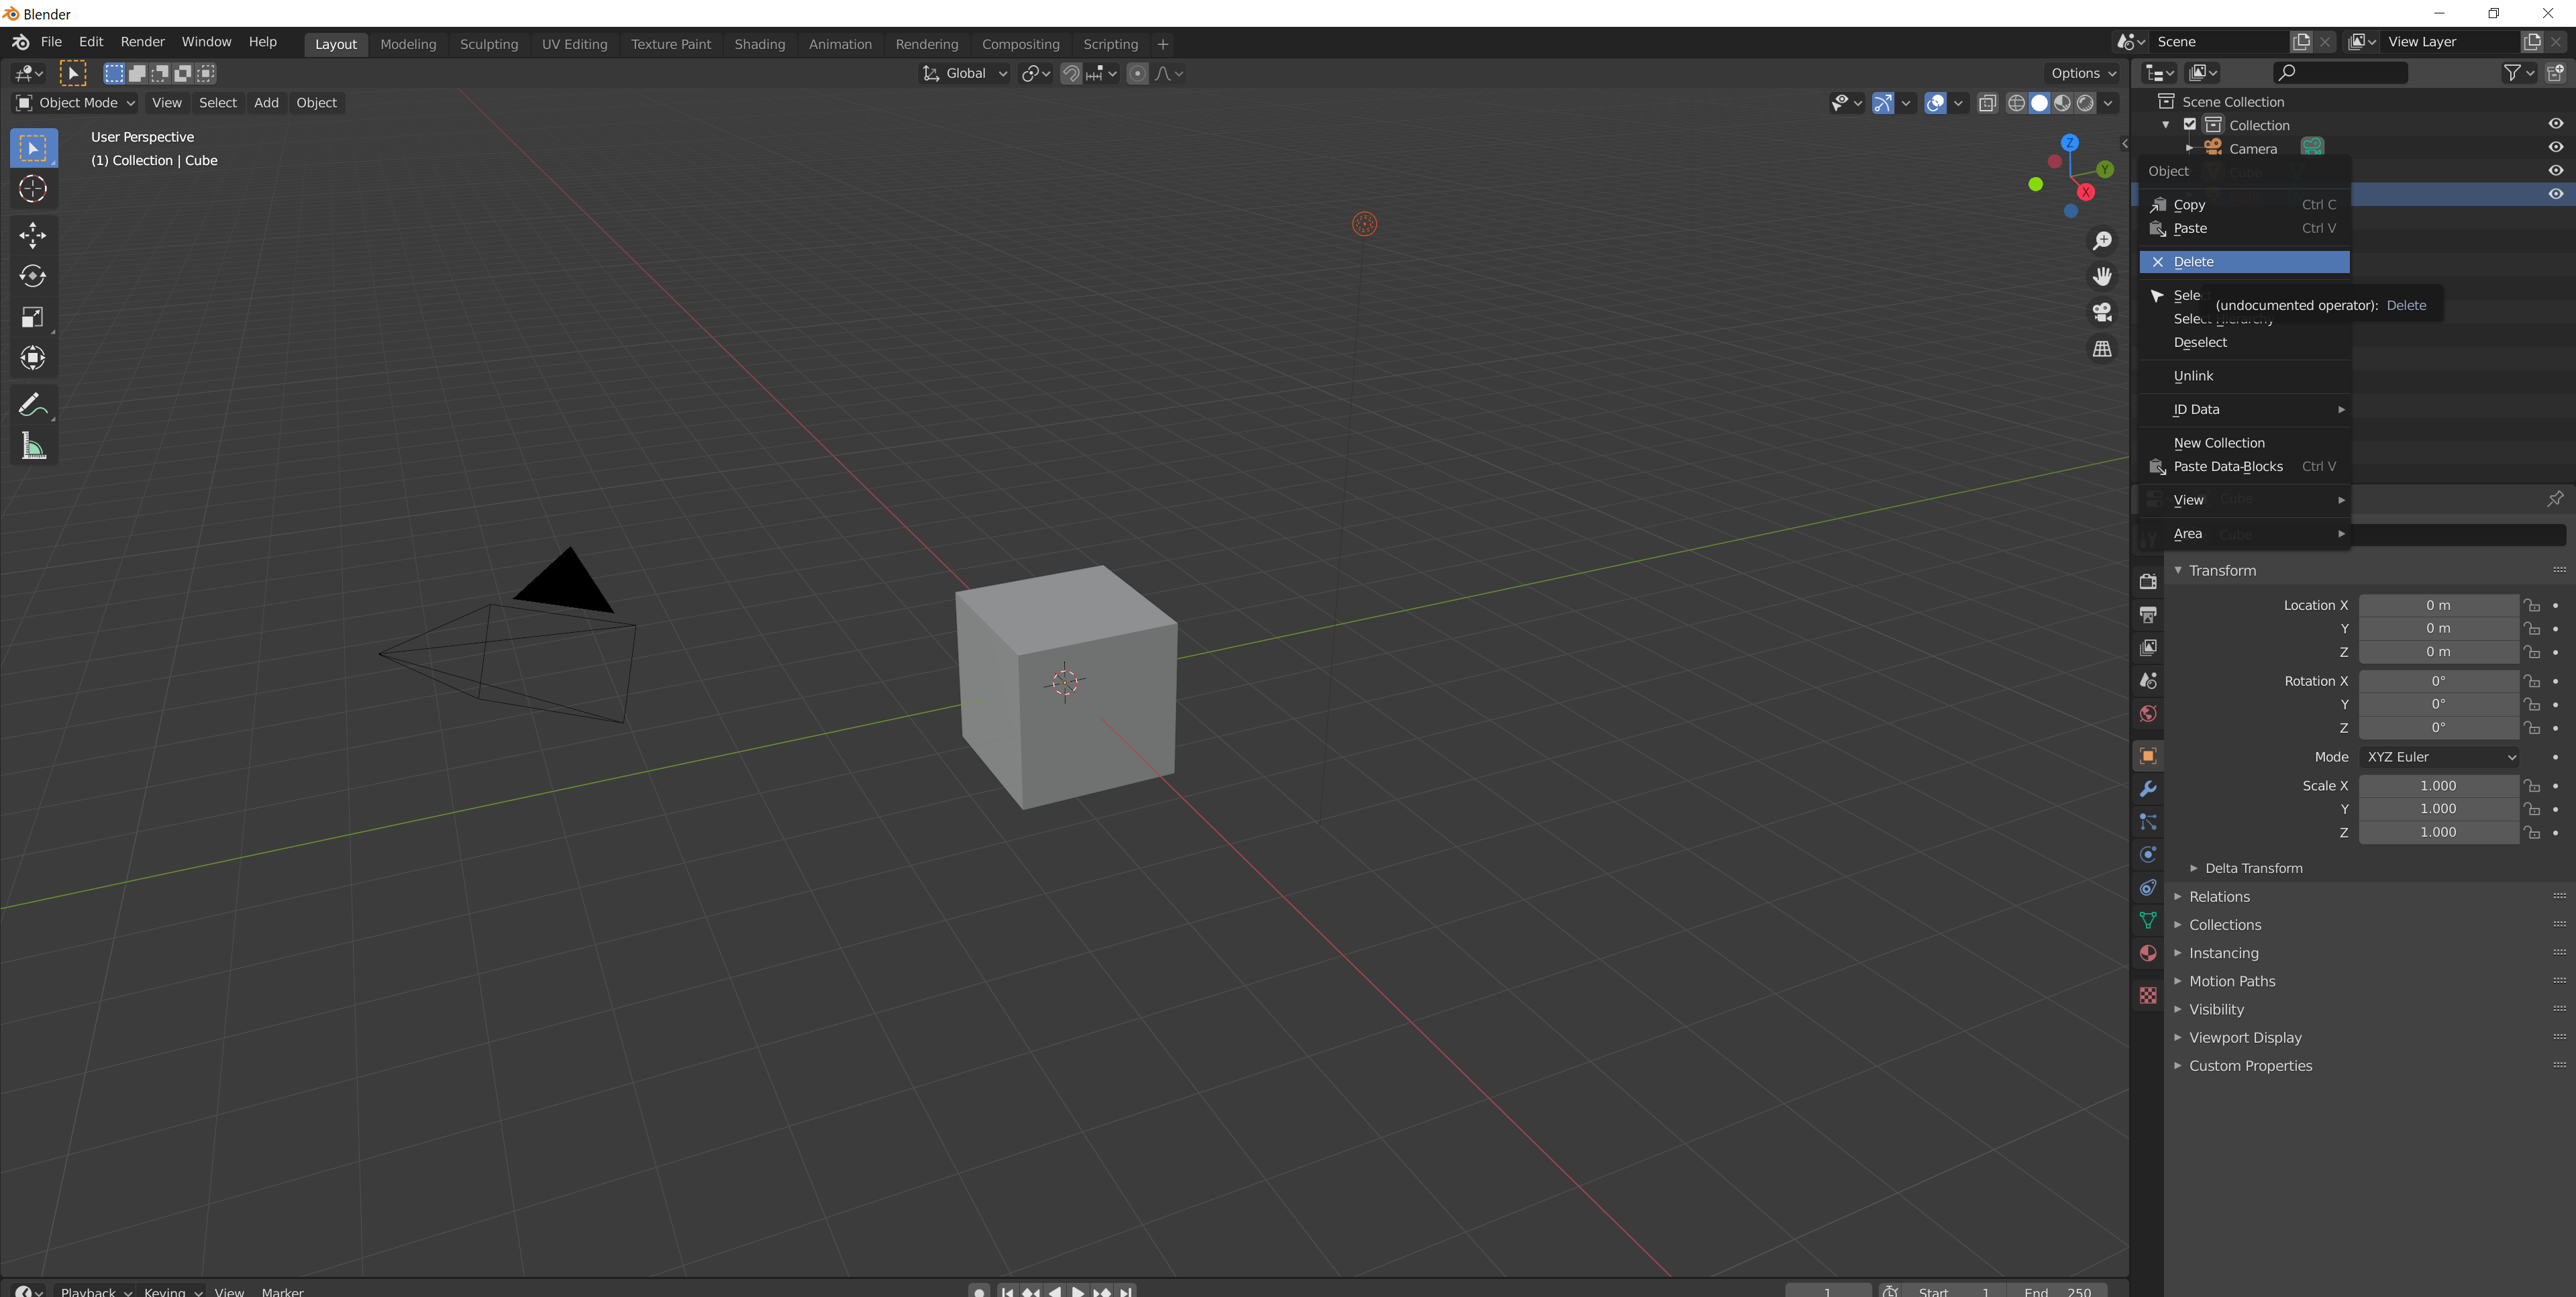
Open Blender, and delete the Camera, Cube, and Light on the right-hand side of the page by right-clicking on them, and pressing Delete.
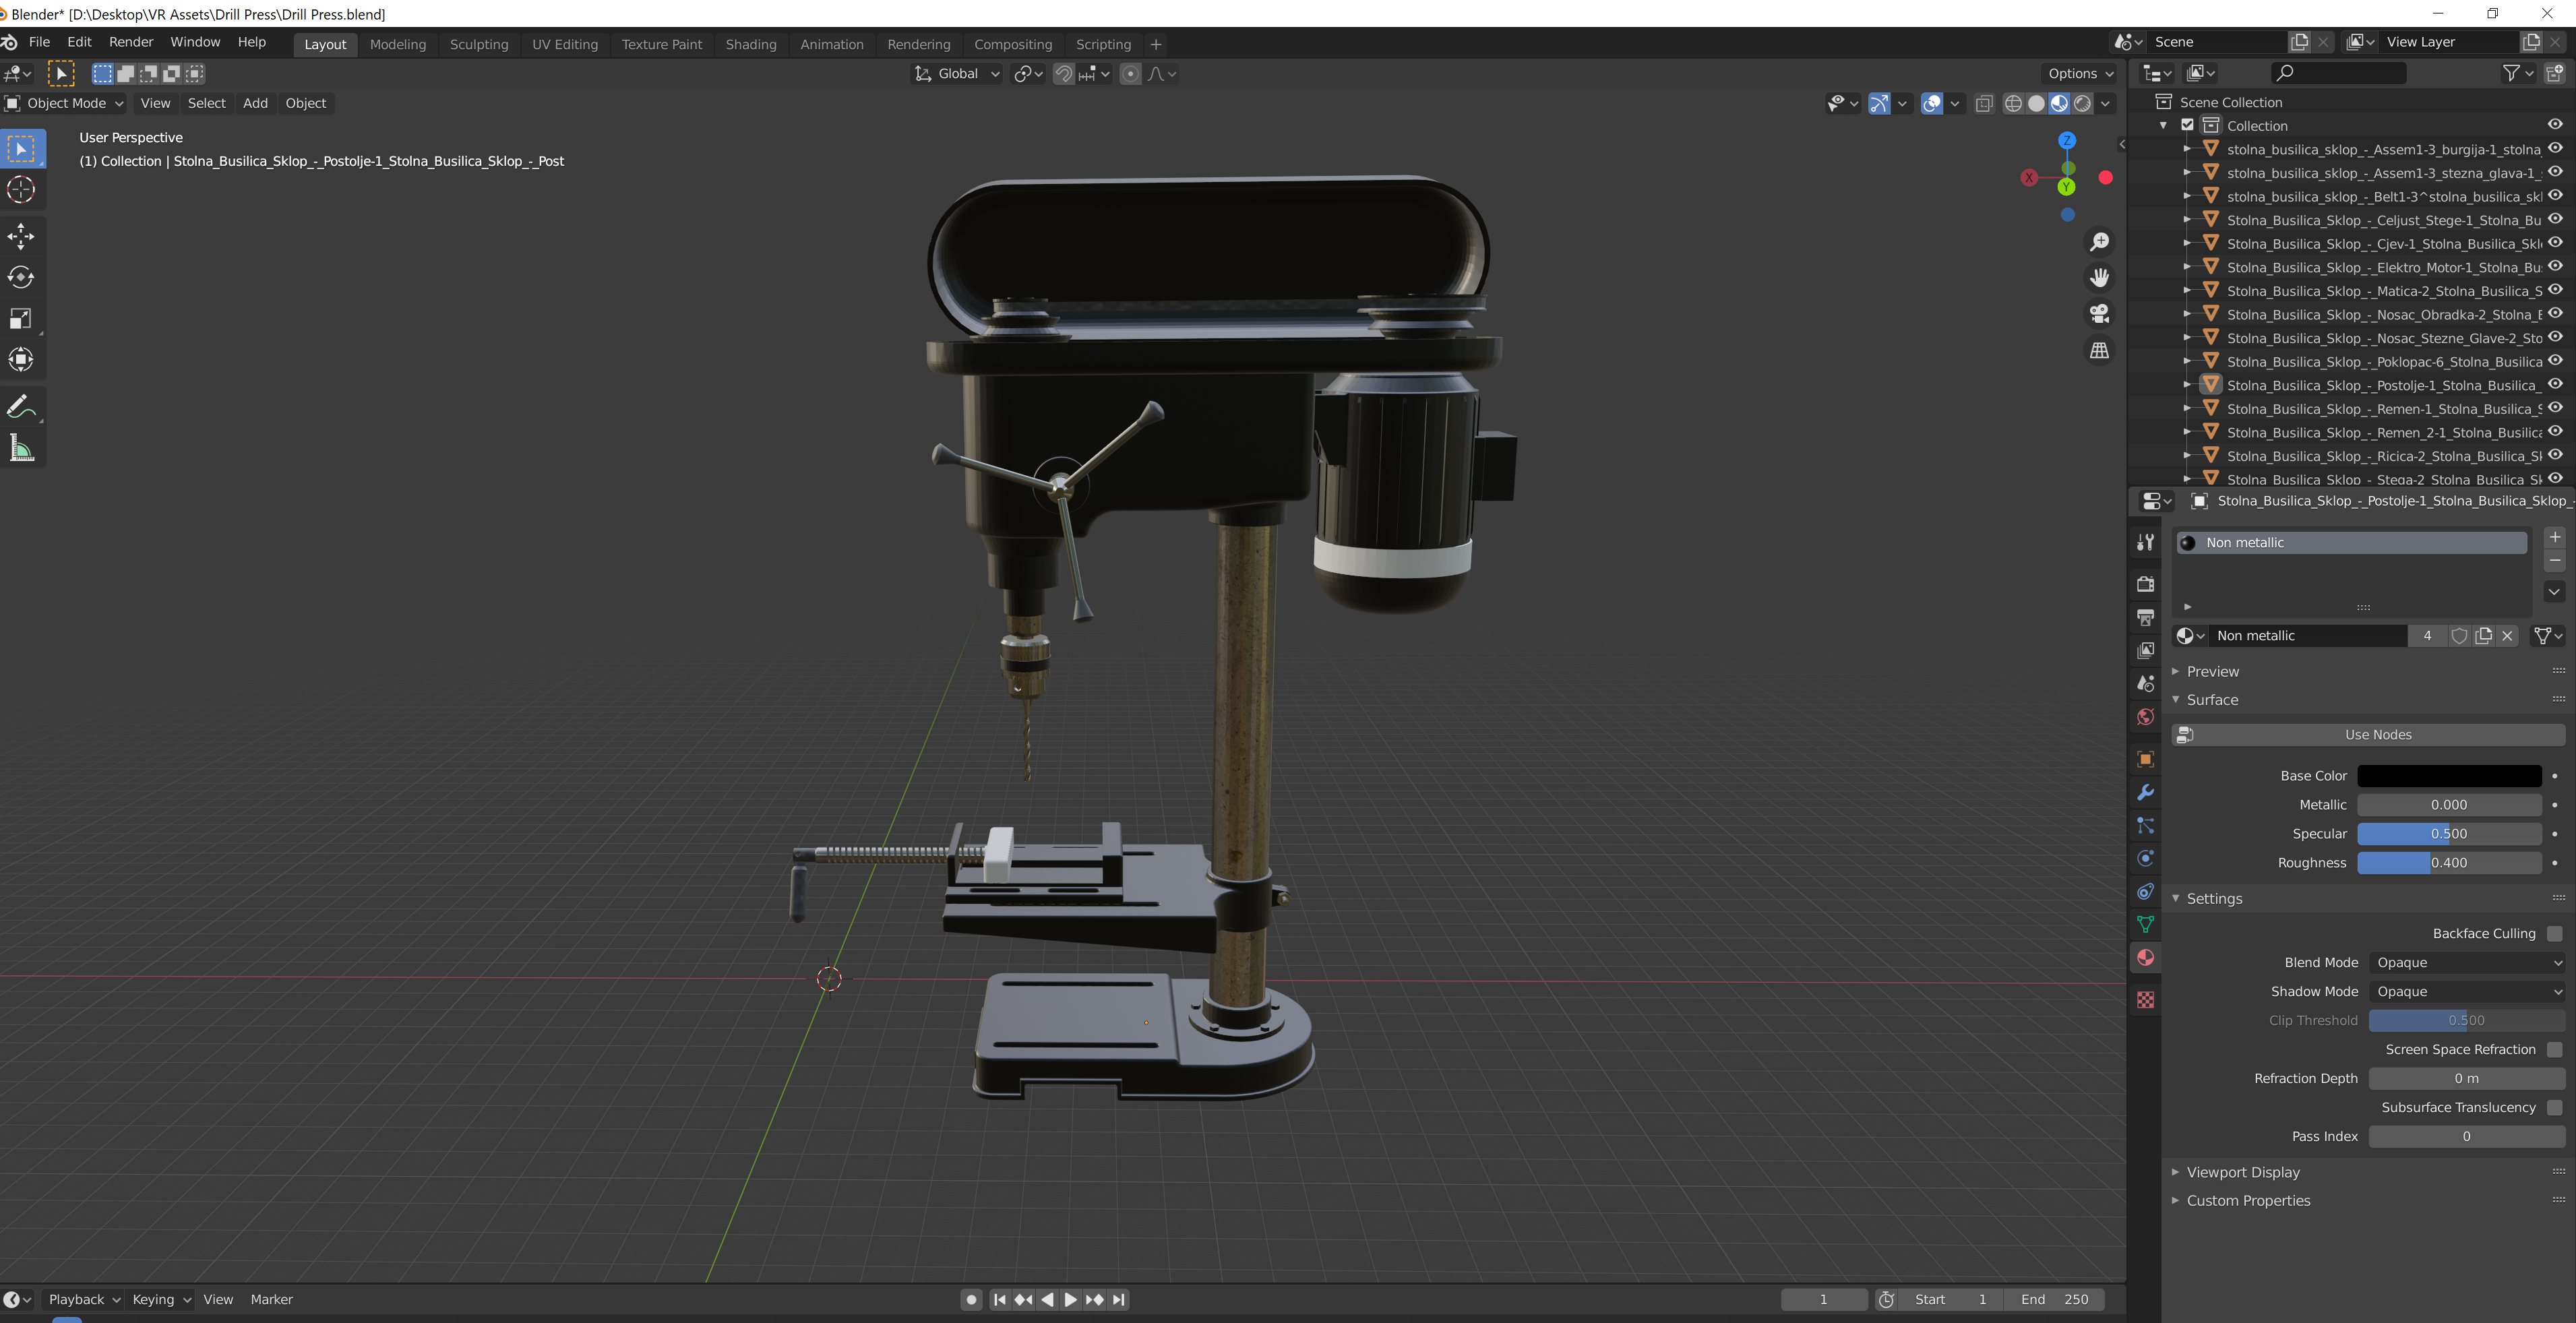
Now, from the top left corner, press File, Import and Stl. Navigate towards the folder that contains your .STL files. Once in the folder, CTRL + left-click all the .STL files, and finally click on Import STL. Once imported, the assembly will no longer have the textures or material appearances that were assigned to it in SOLIDWORKS. However, it is possible to assign new colors and/or textures to all the imported components using Blender.
Exporting to Unity
In Blender, from the top left corner, press File, and then Save. Simply drag and drop the .blend file into Unity, where the assembly can now be used as an asset. If you wish to modify the asset, such as change its size or its appearance, simply open the .blend file and modify it using Blender.
Exporting with Textures
The process of exporting with textures requires the use of Solidworks Visualize and a bit of setup, but allows for exporting with less steps. The quality (weight) of the exported asset is not directly obvious, however, as SW Visualize does not give an option for the quality of the export. According to the documentation, the quality of the polygonal file created by visualize on import is dictated by the properties used in Solidworks for the quality of any open document (go to Options (Gear)>Document Properties (Tab)>Image Quality to change this setting). This was however never properly verified.
Setting Up Visualize
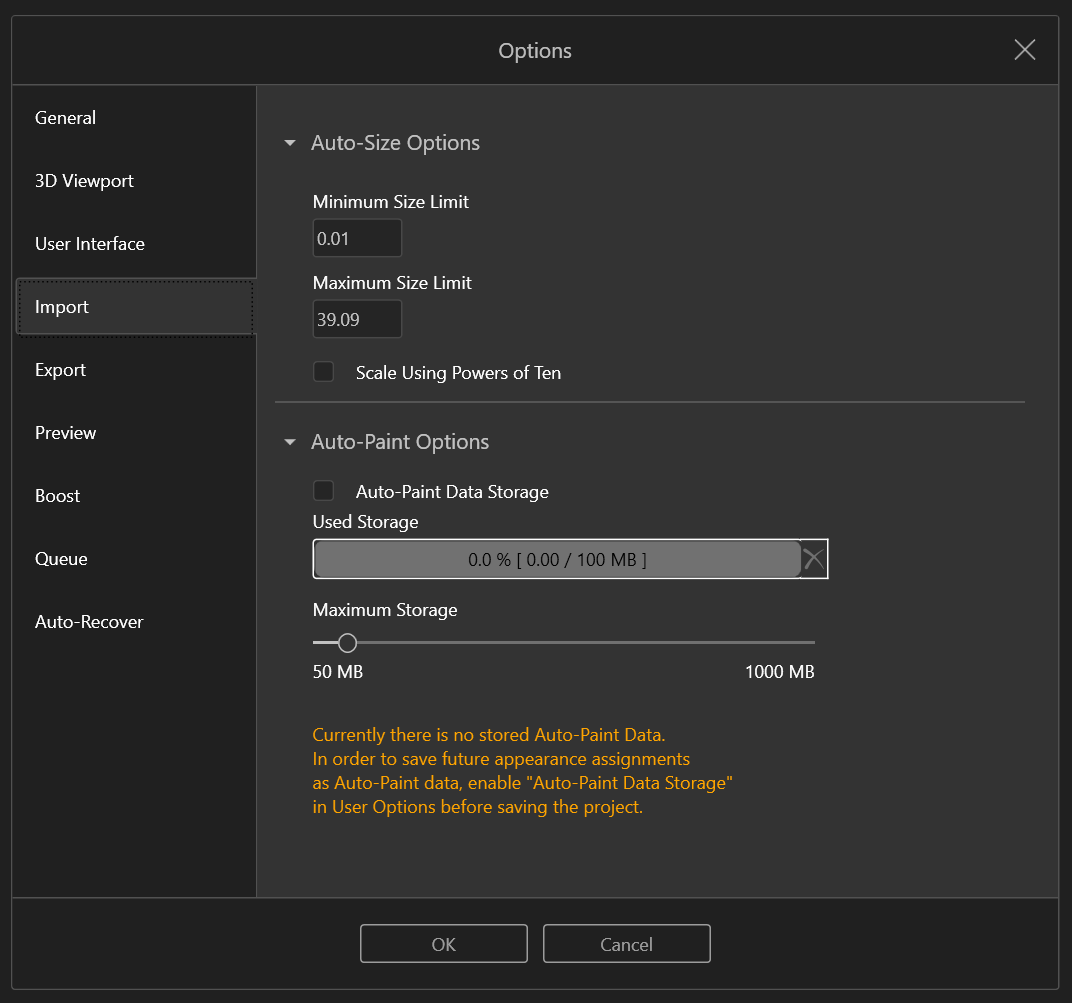
Visualize will by default scale any parts that are imported if they are larger than a specified value. To change this, open Visualize and go Tools>Options>Import, and change the auto-scale options to the desired min and max quantities (this value is in millimeters).
Importing to Visualize
Once you are in Solidworks Visualize, you may simply navigate to File>Import... and browse to your Solidworks part or assembly. The recommended settings for importing are:
- Geometry:
- Automatic part grouping (this is the same as Appearance/Layer when importing .SLDPRT and .SLDASM files)
- Retain structure will make the part exactly as it is in Solidworks, but the export from Visualize will be extremely heavy.
- Do not snap to floor (unless the part wasn't modeled around the origin in Solidworks.
- Instancing ON
- (Part monitoring is optional but might lead to slow loading times)
- Automatic part grouping (this is the same as Appearance/Layer when importing .SLDPRT and .SLDASM files)
- Appearances:
- Ignore Texture References OFF
- Auto search for missing textures ON
- Manual search for missing textures ON
- Other options OFF
Exporting to Unity-Readable Formats
The preferred file types for importing to Unity are FBX or GLB. FBX files are typically more compact, though, while GLB/GLBF are more versatile, and are used in a multitude of programs other than Unity. GLB files contain the textures data in the file itself, such that you do not need to keep the model file with its textures.
- Navigate to File>Export>Export Project...
- Change the file type to your desired type
- Save the file (it is suggested to create a folder within the project directory as all textures will also export as separate files.
You may now use these files in Unity. If you would like to modify the files in Blender, you may also do this with the aforementioned filetypes. To do this, follow the 'Importing .STL Files into Blender' steps from the 'Without Textures' section of this tutorial.
